Proxidize Android Agent is an Android app connected to the Proxidize Cloud Dashboard, enabling you to transform your phone into a global proxy accessible from anywhere in the world. By linking to our cloud dashboard, you can control and manage your phone remotely without needing physical access. This makes the Proxidize Android Agent a global, portable, and remote management proxy solution!
Onboarding New Android Device:
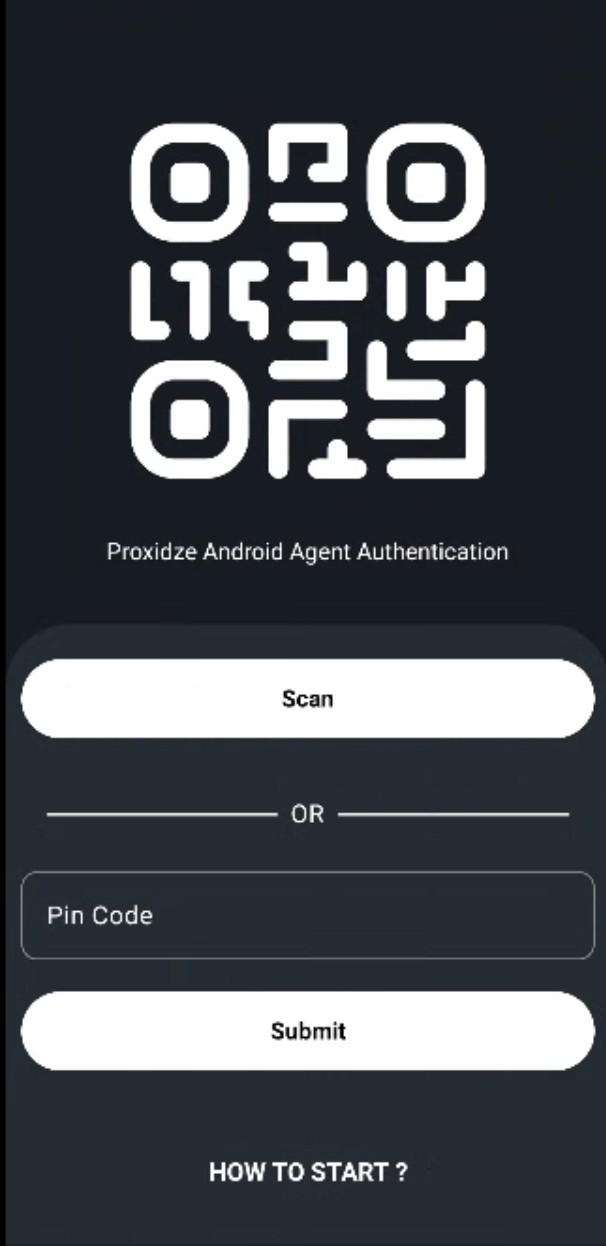
Login: you have to sign up with your preferred way to app.proxidize.com and then log in, in the top right you will see the PIN and QR code that you will use to onboard your phone and you can do all of that just by hitting the "How to Start?" text once you open the app as a second way for login to your dashboard, put the pin or scan the QR code and it will take you to the next screen.
Note: recommended to do that with only mobile data on, otherwise you will see a dialog asking you to disable Wi-fi and enable mobile data, to make sure that the onboarding process goes well, otherwise the app may be stuck on the “Creating Host" screen.
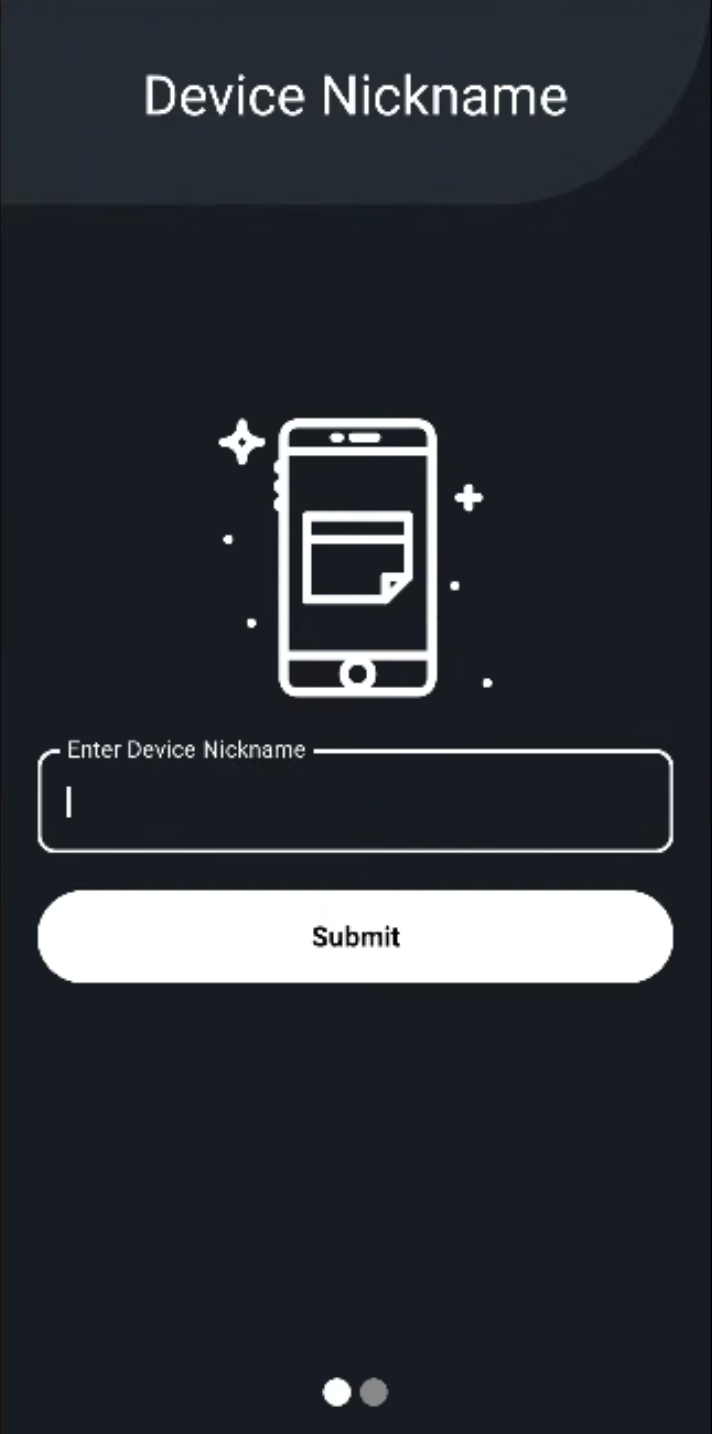
Device registration screen: enter a nickname for the device to be shown on the cloud dashboard.
Permissions Screen: you will need to enable all the listed permissions to enjoy all the features from the dashboard, except the "SMS default app" permission, it is optional, but it is recommended at the same time so you can get a full experience with our actions regarding SMS from the cloud dashboard.

Creating Host screen: a loader will show up that will take a few moments to create and set up your host and endpoint for you

Notes to be noticed during the onboarding process :
Make sure that the user enters the PIN (case sensitive) or scans the QR and then enters the nickname before the PIN/QR expires (Specified on the Dashboard), otherwise, the app may be stuck on the Creating Host page. In that case, you will have to restart the app and repeat the onboard process.
Make sure that the SIM cards have data to connect to the internet before getting started with the onboarding process.
Connect and Getting Started:
Hit the connect button, and the connecting process will begin (Connecting the proxies and connecting to the router)
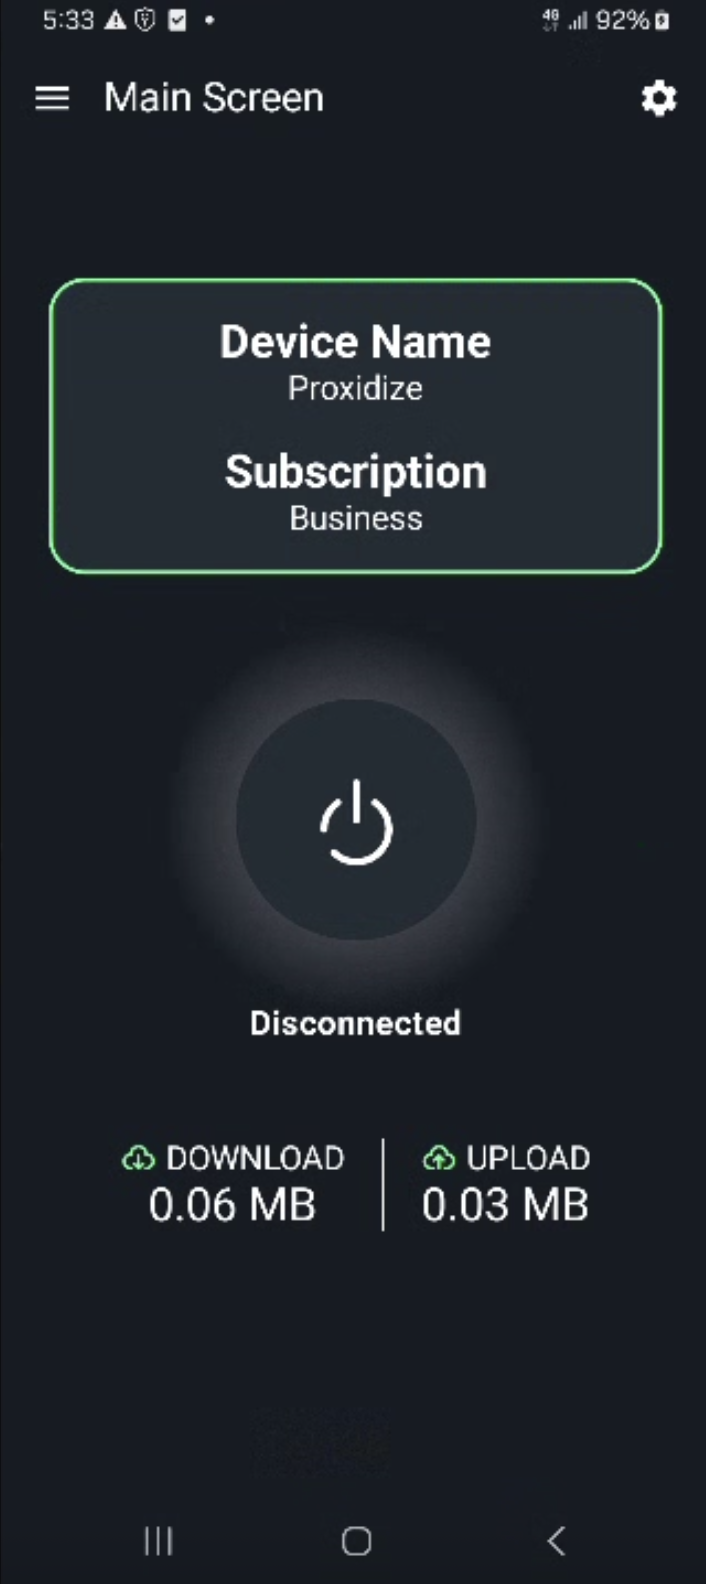
Once the Connected Image appears then you are good to go.
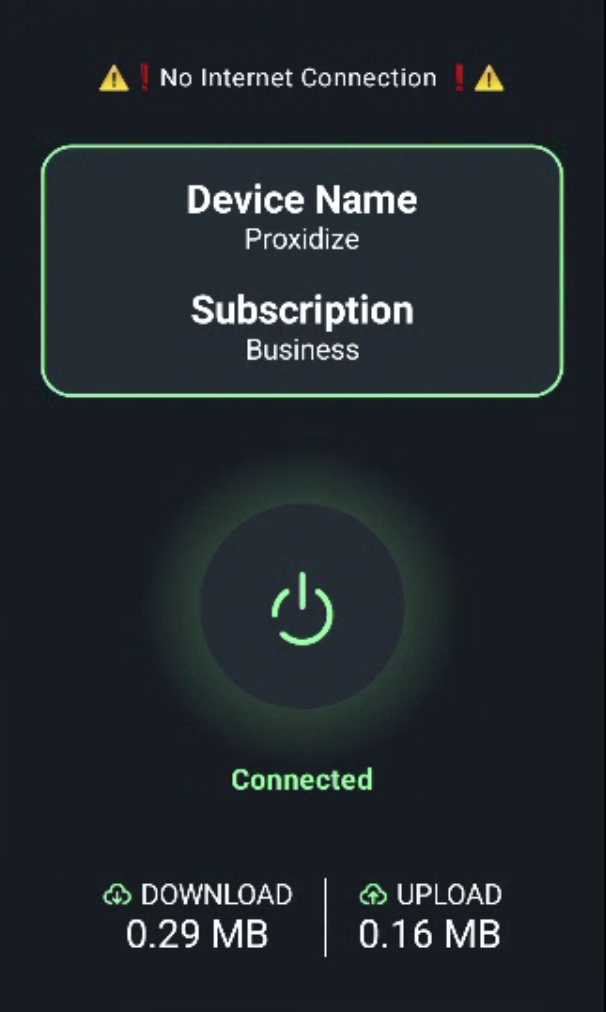
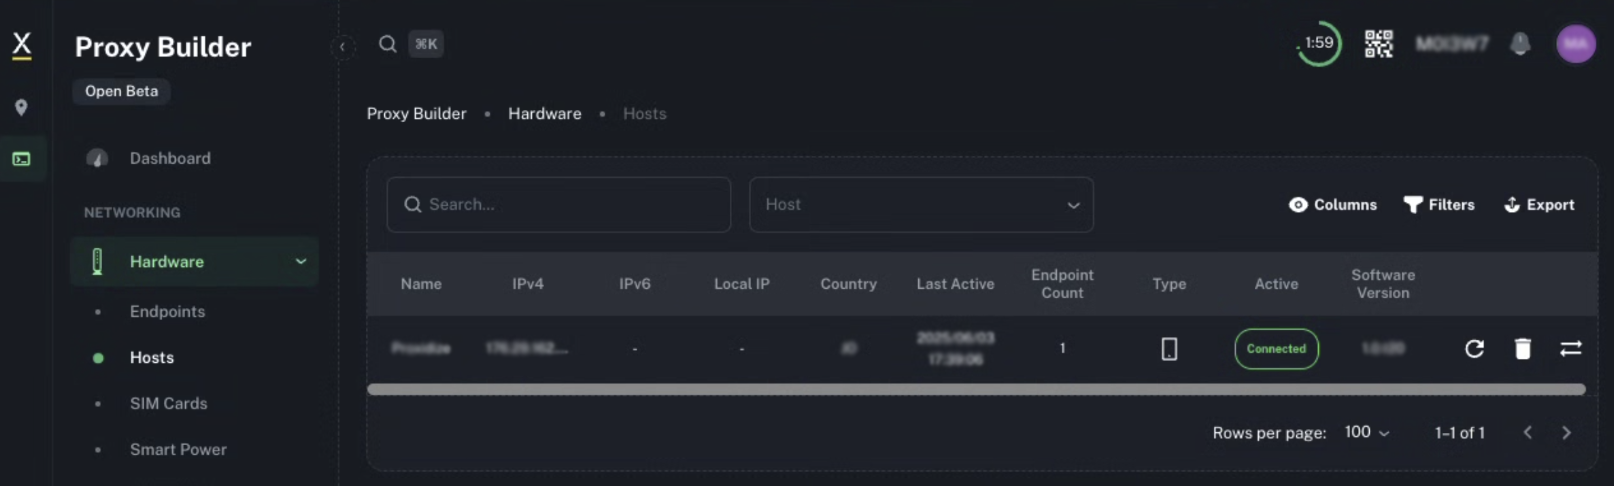
Once the device is connected successfully, it will be onboarded and show up on your dashboard under the “Hosts” tab.
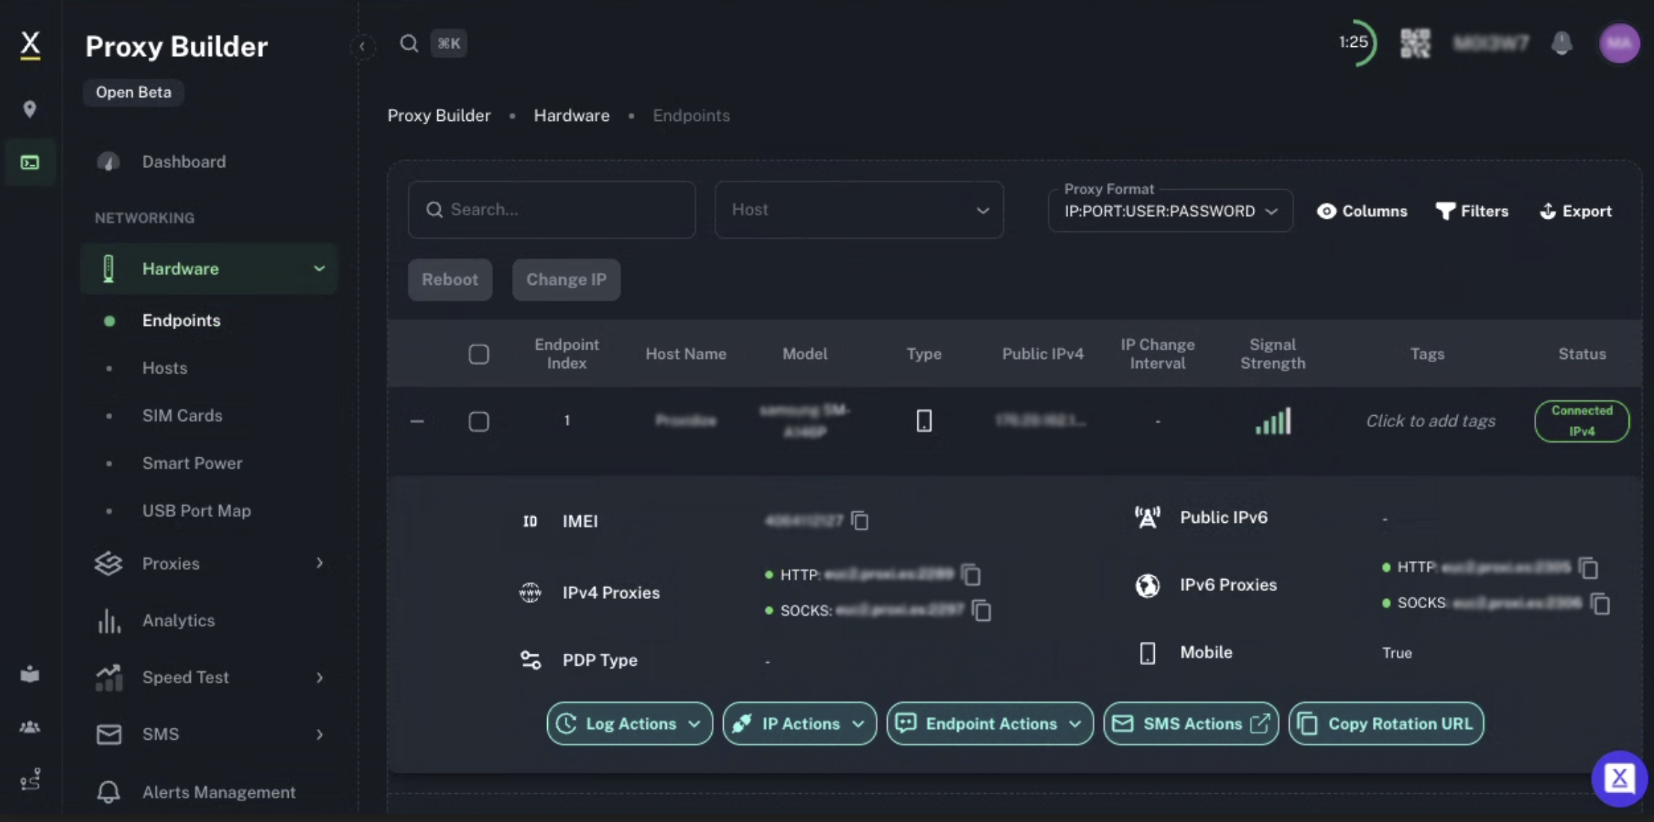
The proxies will be available on your dashboard and you can see them either from the endpoints tab by expanding your endpoint row or from the Proxies tab, then you can copy your proxy and use it wherever you want.
You can find your proxy credentials in the host settings tab under the "Endpoints" tab.
General notes:
Make sure that the mobile has a valid SIM card with internet data, otherwise the app will be closed directly.
Make sure that you don’t enable the Wi-fi unless with Wi-fi-Backend enabled otherwise, the app will not be able to sync the data with the dashboard. Recommended to restart the app and connect again if you enabled the Wi-fi backend feature.