What is the Proxidize Android Agent?
The Proxidize Android Agent is an Android app that connects your phone directly to the Proxidize Cloud Dashboard. Once connected, your phone becomes a fully remote, globally accessible mobile proxy, no physical access required. You can control, manage, and monitor your device entirely from the cloud dashboard.
Download the app on the Google Play Store.
Before You Begin
To ensure a smooth onboarding and stable proxy performance, make sure of the following before starting:
1. Disable or uninstall any VPN applications
Running a VPN alongside the Android Agent will cause conflicts. Fully disable or uninstall all VPN apps before proceeding.
2. Use only one SIM card, inserted in Slot 1
Only one SIM card should be in the device, placed in SIM Slot 1. Using Slot 2 or having multiple SIMs inserted can cause connectivity issues.
3. Ensure you have a strong mobile signal
Proxy stability is directly tied to signal quality. A weak or unstable signal will result in an unstable proxy. Make sure you're in an area with good mobile coverage.
4. Grant all required app permissions
The Android Agent requires all permissions to function correctly. Any denied permission will cause issues during onboarding or proxy usage.
5. Turn off Wi-Fi and use mobile data only
Before starting the onboarding process, disable Wi-Fi and make sure mobile data is active. If Wi-Fi is left on, you'll see a prompt asking you to switch to mobile data. Skipping this may cause the app to get stuck on the "Creating Host" screen.
6. Make sure your SIM has an active data plan
The app requires a working mobile data connection. If there is no data on your SIM, the app will close immediately.
Onboarding Steps:
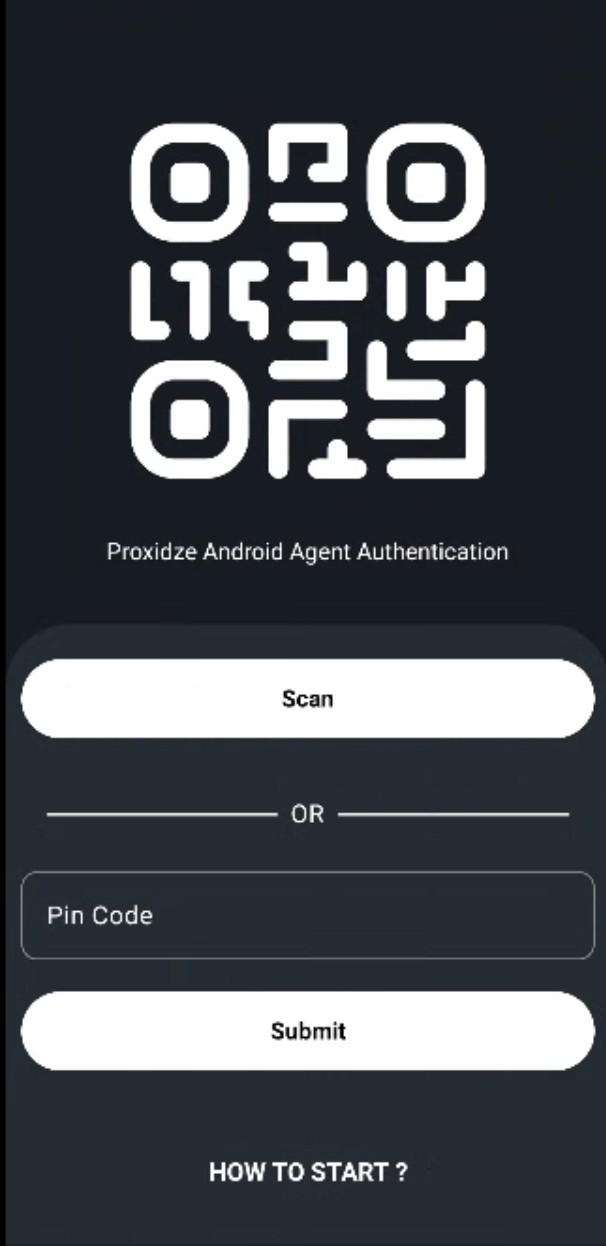
Step 1 - Log in
-
Open the Proxidize Android Agent app.
💡 Tap "How to Start?" on the welcome screen, this will guide you through linking your device to your dashboard.
-
Alternatively, Go to app.proxidize.com, sign in, and find your PIN and QR code in the top-right corner of the dashboard.
-
In the app, enter the PIN (case-sensitive) or scan the QR code to proceed.
⚠️ Important: The PIN and QR code expire after 3 minutes. Make sure you complete this step and enter your device nickname before they expire. If they expire, you will need to restart the app and repeat the process from the beginning.
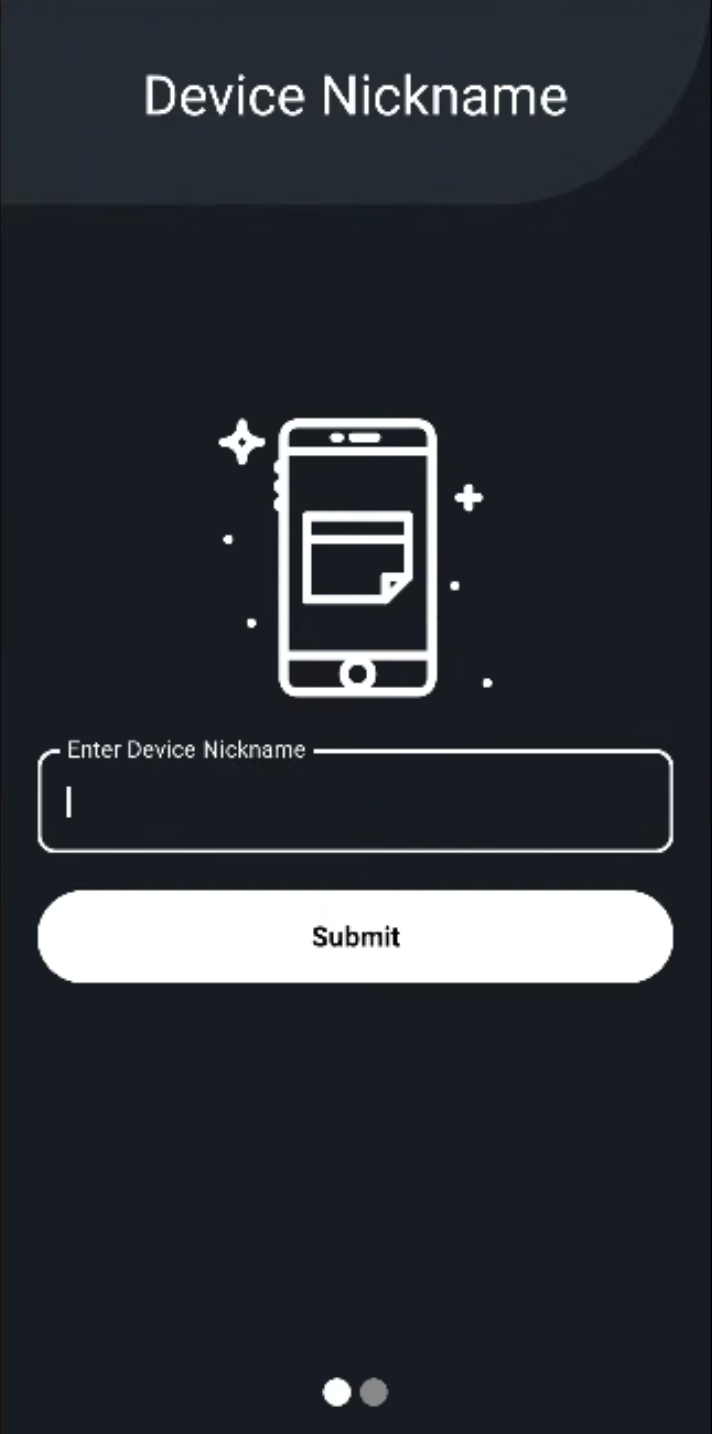
Step 2 — Register Your Device
Enter a nickname for your device. This is the name that will appear on your cloud dashboard to identify this phone.
Step 3 — Grant Permissions
You will be presented with a list of permissions to enable. Grant all permissions to ensure full functionality.

Step 4 — Creating Your Host
A loading screen will appear while the app sets up your host and endpoint. This takes a few moments, do not close the app during this step.

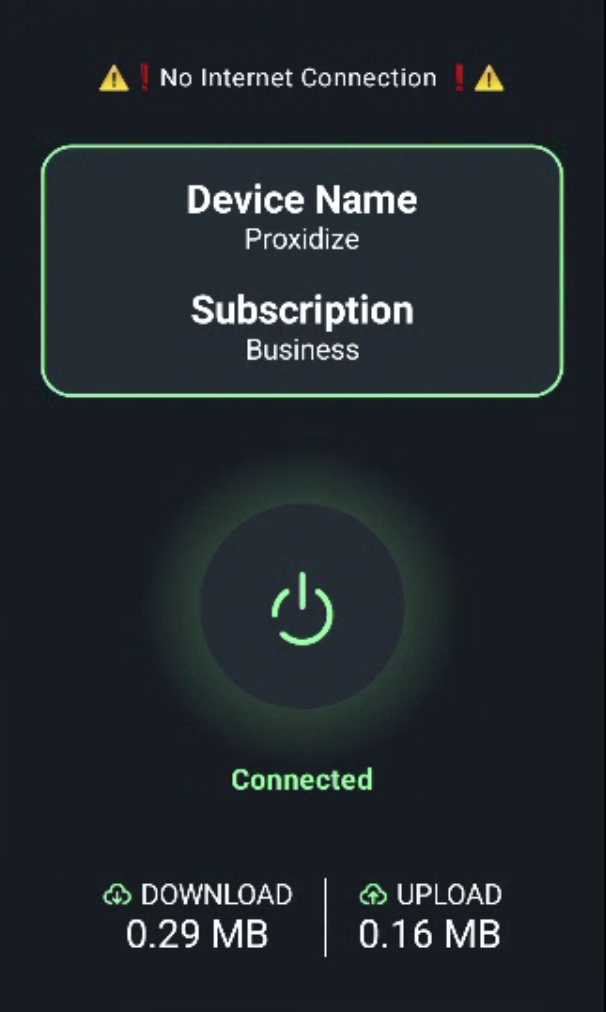
Step 5 — Connect
Tap the Connect button to begin the connection process. The app will connect your proxies and link to the router.
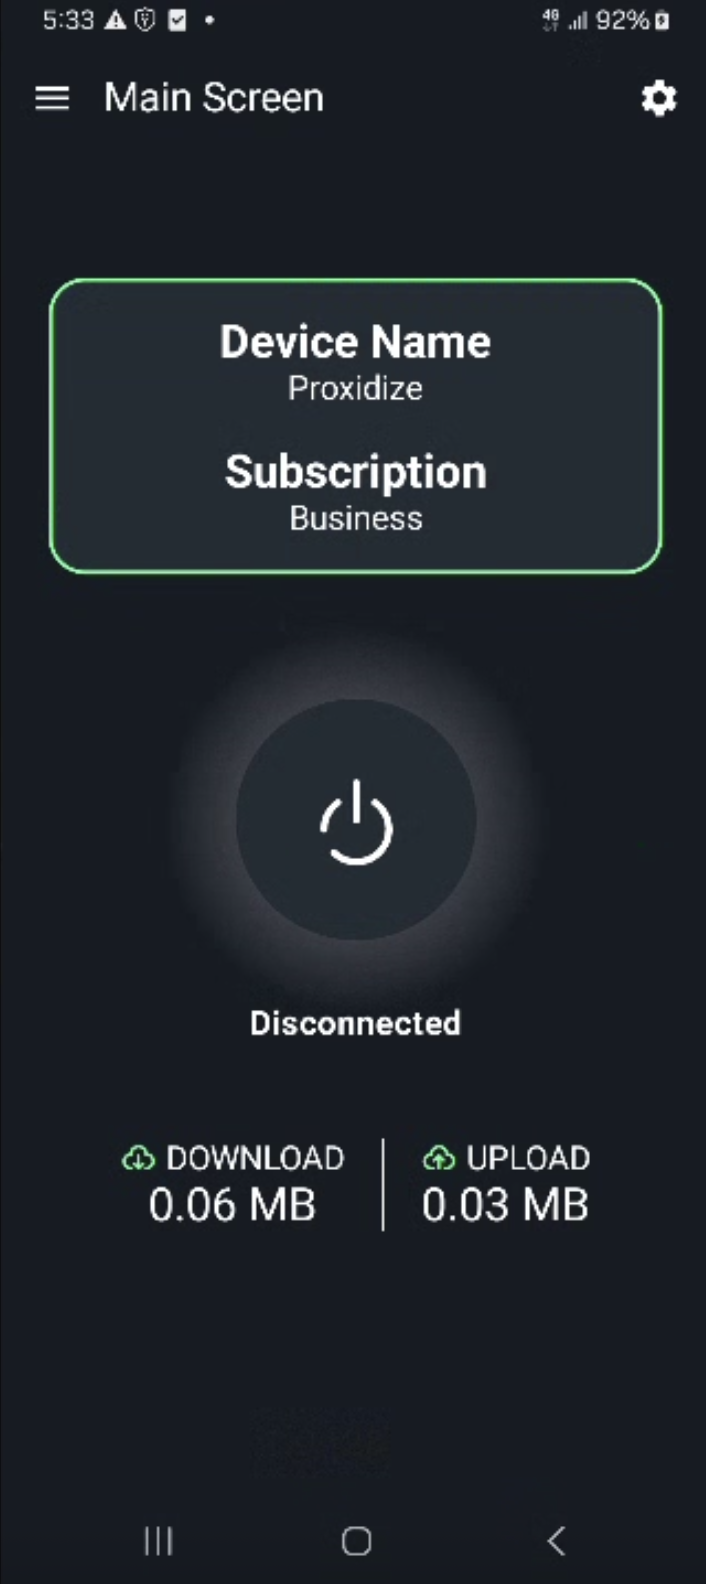
Once the Connected screen appears, your device is successfully onboarded.
After Onboarding
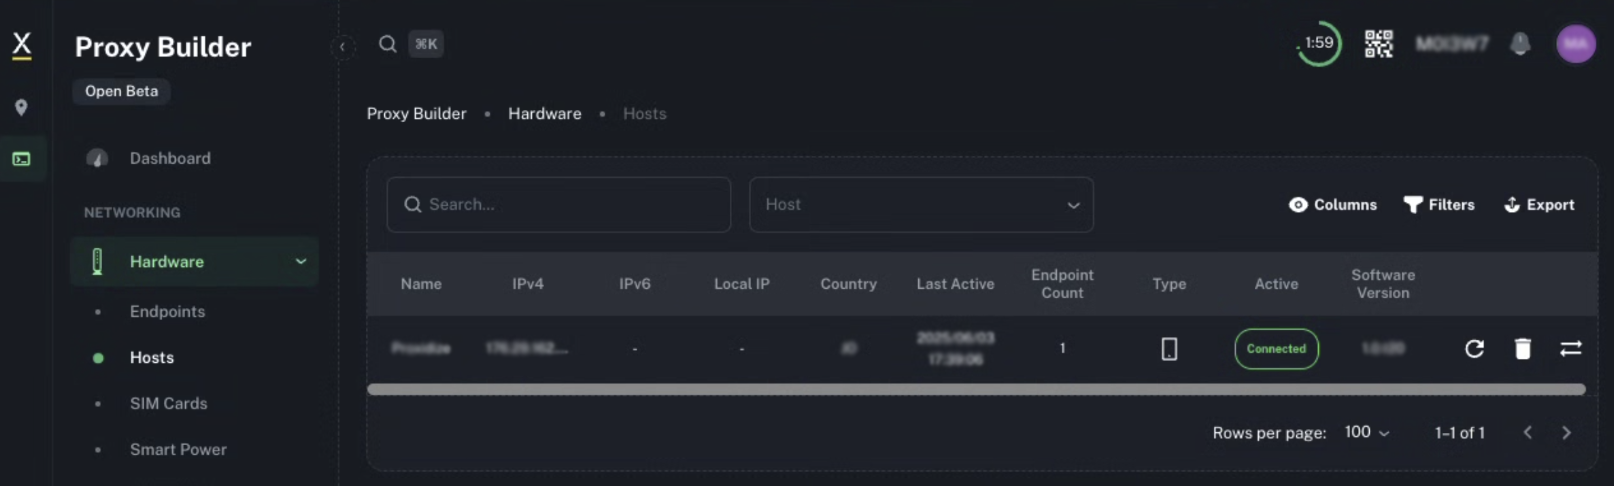
- Your device will appear under the Hosts tab on your cloud dashboard.
- Your proxies will be available under the Endpoints tab (expand your endpoint row) or under the Proxies tab.
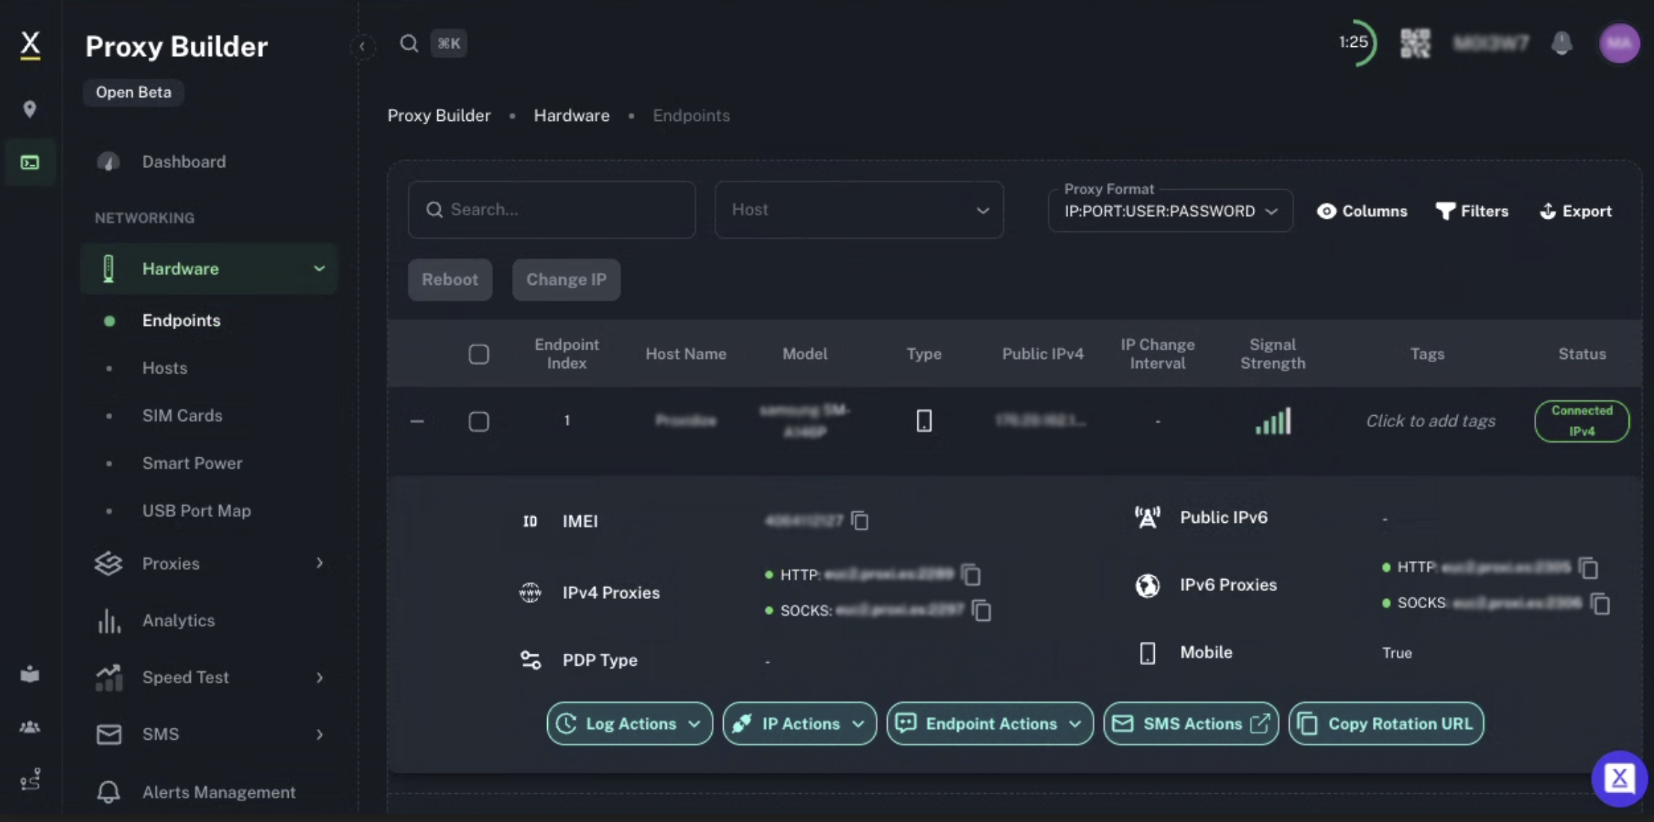
- Copy your proxy details from there and use them wherever needed.
- Your proxy credentials can be found in the Host Settings under the Endpoints tab.
General Notes
- Do not enable Wi-Fi while the app is running unless you have the Wi-Fi Backend feature enabled. Enabling Wi-Fi without this feature will prevent the app from syncing with the dashboard. If this happens, restart the app and reconnect.
- If the app gets stuck on the Creating Host screen, restart the app and repeat the onboarding process from Step 1.